Astrophotography Camera Buyer's Guide: Sensors, Cooling & Trade-Offs
Affiliate disclosure: Some links on this page are affiliate links. If you buy through them we earn a small commission at no extra cost to you. This never influences which products we recommend — we only suggest things we'd buy ourselves. Product prices and availability are accurate as of the date published and are subject to change. Always check Amazon for current pricing before purchasing. Learn more.
Quick Picks
SVBONY SV305C Astrophotography Camera, 2.1MP IMX662 Color Telescope Camera with Removable UV IR Cut Glass, 1.25"
IMX662 sensor provides decent sensitivity for deep-sky astrophotography
Buy on AmazonSVBONY SV905C Guide Camera, 1.23MP CMOS Sensor, 1.25" USB2.0 Astrophotography Camera with AR-Coated, for Autonomous
1.25 inch form factor fits standard telescope focuser mounts
Buy on AmazonCanon EOS R8 Mirrorless Camera Body, Full‑Frame CMOS Sensor, 24.2Megapixels, 4K 60p Video, Dual Pixel AutofocusII,
Full-frame CMOS sensor captures excellent light sensitivity for night sky
Buy on Amazon| Product | Price Range | Top Strength | Key Weakness | Buy |
|---|---|---|---|---|
| SVBONY SV305C Astrophotography Camera, 2.1MP IMX662 Color Telescope Camera with Removable UV IR Cut Glass, 1.25" best overall | $$ | IMX662 sensor provides decent sensitivity for deep-sky astrophotography | 2.1MP resolution limits detail capture compared to modern astrophotography cameras | Buy on Amazon |
| SVBONY SV905C Guide Camera, 1.23MP CMOS Sensor, 1.25" USB2.0 Astrophotography Camera with AR-Coated, for Autonomous also consider | $$ | 1.25 inch form factor fits standard telescope focuser mounts | USB 2.0 connection limits data transfer speed versus USB 3.0 | Buy on Amazon |
| Canon EOS R8 Mirrorless Camera Body, Full‑Frame CMOS Sensor, 24.2Megapixels, 4K 60p Video, Dual Pixel AutofocusII, also consider | $$ | Full-frame CMOS sensor captures excellent light sensitivity for night sky | Body-only purchase requires separate lens investment for astrophotography | Buy on Amazon |
Choosing an astrophotography camera means navigating a decision space where sensor size, pixel scale, cooling capability, and connection speed all intersect , often with competing trade-offs. The right camera depends on whether you’re imaging deep-sky objects, guiding a mount, or shooting wide-field Milky Way frames. Good astrophotography starts with understanding those distinctions before you open your wallet.
The categories look similar on paper but behave very differently in the field. A dedicated astronomy camera, a guide camera, and a modified mirrorless body each solve a different problem. Getting that match right is the first decision.
What to Look For in an Astrophotography Camera
Sensor Size and Pixel Scale
Sensor physical size determines how much sky you can capture in a single frame. A larger sensor paired with a given focal length produces a wider field of view , useful for extended nebulae or Milky Way landscapes. Pixel scale is the derived number that matters most for matching camera to telescope: arc-seconds per pixel, calculated from pixel size and focal length. Too coarse and you waste resolution on short focal lengths; too fine and atmospheric seeing limits your actual resolution anyway.
For most beginners working with a mid-range refractor at 400, 600mm focal length, a sensor with pixels in the 2, 4 micron range is a reasonable target. Smaller pixels require better tracking and seeing to exploit. Larger pixels collect more light per unit time, which helps on faint targets but limits resolution on smaller objects like planetary nebulae or galaxies with fine structure.
Cooling and Noise Performance
Thermal noise , dark current , accumulates in any CMOS sensor over time. At ambient temperature, a long exposure on a warm night picks up significant thermal signal that has nothing to do with the sky. Dedicated astronomy cameras often include thermoelectric coolers that pull the sensor temperature 30, 40°C below ambient, dramatically suppressing dark current.
Uncooled cameras , including most mirrorless bodies used for astrophotography , rely on shorter sub-exposures and stacking to average out noise. This works, and modern stacking software handles it well, but it requires more total integration time to reach the same signal-to-noise ratio. For deep-sky targets requiring hours of data, cooling is a practical advantage, not a luxury.
Connection Interface and Workflow
USB 2.0 versus USB 3.0 matters most for planetary and lunar imaging, where you’re streaming video at high frame rates to capture sharp frames during moments of steady seeing. For deep-sky work, where individual exposures run 60, 300 seconds, USB 2.0 is rarely a bottleneck. The workflow question , dedicated capture software versus camera-native app versus ASCOM/INDI driver compatibility , matters as much as the connector.
Dedicated astronomy cameras integrate cleanly with N.I.N.A., Sequence Generator Pro, or Ekos/KStars. Mirrorless bodies can connect via tethering, but the integration is looser. If you’re building an automated imaging sequence with plate-solving and meridian flips, a camera with proper astronomy software support reduces friction considerably.
Dual Use: Guide Camera vs. Imaging Camera
A guide camera’s job is not to produce pretty images , it’s to track a star and feed position corrections to your mount at high cadence. For that task, low read noise, fast frame rate, and a small pixel scale to resolve the guide star centroid are what matter. Megapixel count is nearly irrelevant for guiding.
Imaging cameras prioritize different things: total well depth, read noise at low gain for faint targets, and dynamic range. Trying to guide with your imaging camera while also capturing data is technically possible but practically limiting. Separating the two functions , with an off-axis guider or a guide scope , is standard practice for serious astrophotography work. Knowing which role you’re filling when you buy is the single clearest question you can ask.
Top Picks
SVBONY SV305C Astrophotography Camera
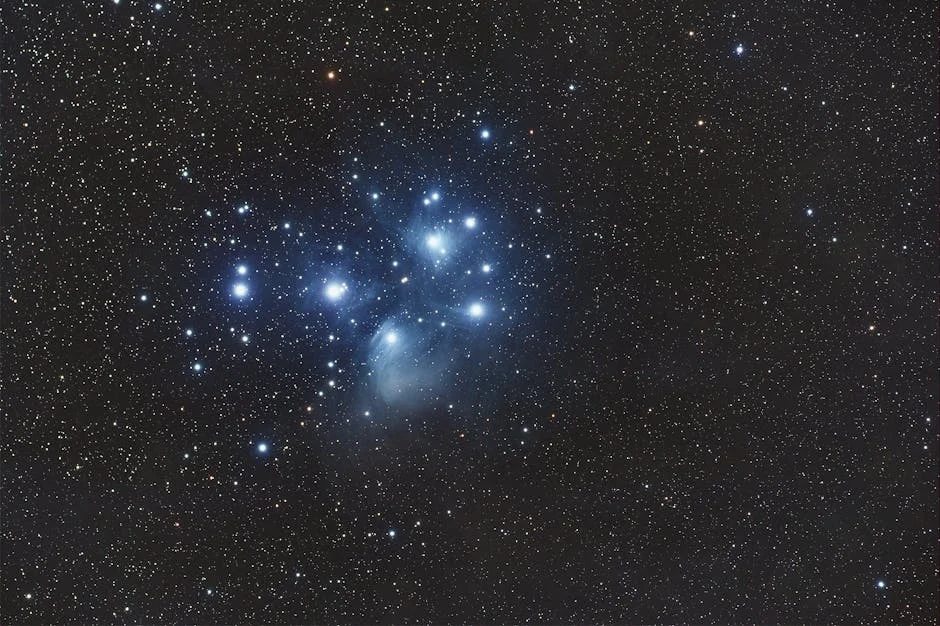
The SVBONY SV305C uses Sony’s IMX662 sensor, which is a meaningful step up from the older IMX290-class chips that populated this price tier a few years ago. Backside-illuminated architecture gives it reasonable quantum efficiency for a camera without active cooling, and for an entry-level imaging camera, it performs creditably on brighter emission nebulae and star clusters where integration time is moderate.
The removable UV/IR cut glass is a detail worth noting. Stock, the filter blocks the hydrogen-alpha wavelength that defines most emission nebulae. Remove it, and the camera becomes sensitive to H-alpha , useful if you’re pairing it with a narrowband filter. That option on a camera at this price point is a practical flexibility that costs nothing once you own it.
Resolution is the honest limitation here. At 2.1MP, this sensor captures sufficient detail for objects with apparent angular size, but fine structure in galaxies or small planetary nebulae is not where this camera earns its keep. Think of it as a solid starting point for learning the workflow , calibration frames, stacking, stretching , before stepping up to a higher-resolution sensor when the process is comfortable.
Check current price on Amazon.
SVBONY SV905C Guide Camera
Autoguiding is what separates tracked images that show trailing from ones that don’t, and the SVBONY SV905C is purpose-built for that task. The 1.23MP CMOS sensor is sized and tuned for guide star acquisition , you don’t need high resolution or wide dynamic range to centroid a star and push corrections to a mount controller every second or two.
The AR-coated optics are a genuine functional detail rather than marketing language. Anti-reflection coatings on the window reduce the ghost reflections that can confuse a guiding algorithm into tracking the wrong centroid. On a bright guide star, this matters less. On a marginal guide star in a sparse field, anything that reduces spurious signal is worth having.
USB 2.0 is adequate here. Guide cameras don’t stream high-resolution video , they send small frames at moderate frame rates, and USB 2.0 handles that load without complaint. The 1.25-inch barrel fits a standard guide scope focuser or most off-axis guider ports. For someone building a first guided imaging rig, this camera fits the guiding role cleanly without overcomplicating the setup.
Check current price on Amazon.
Canon EOS R8 Mirrorless Camera Body
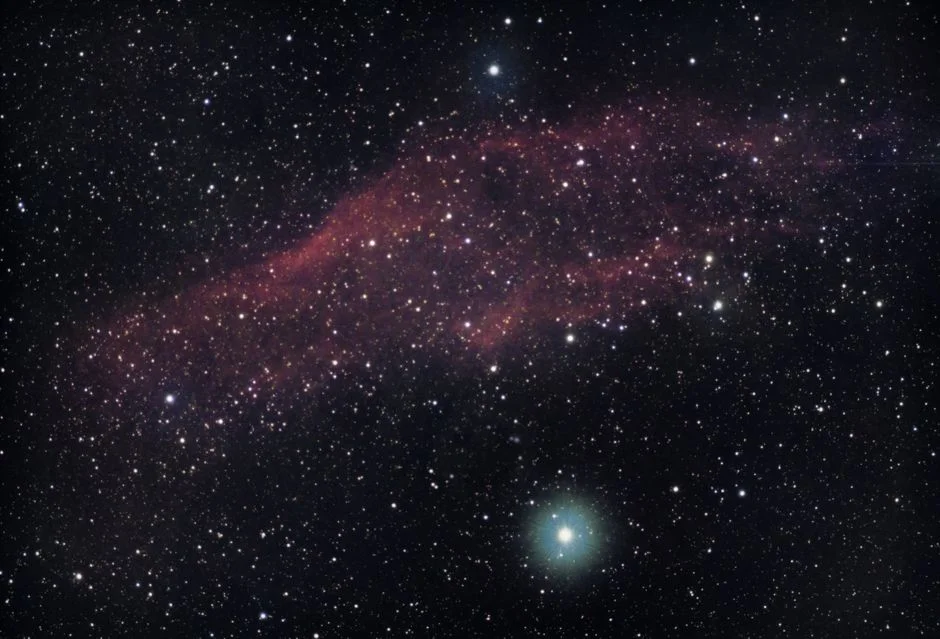
The Canon EOS R8 brings a full-frame 24.2MP sensor to the astrophotography context , which means a large imaging area, excellent light gathering per frame, and a pixel scale that works well with mid-length focal length lenses for wide-field Milky Way and constellation work. Full-frame sensors at this resolution capture genuine detail across large angular fields in ways that the smaller dedicated astronomy sensors in this price tier simply can’t match.
For nightscape and wide-field work , think Milky Way arch over a landscape, star clusters in context with surrounding nebulosity , a mirrorless body with a fast prime lens is a harder argument to beat than any of the dedicated cameras here. The body pairs with any RF-mount lens, and adapted EF glass works reliably through an inexpensive ring adapter. That lens ecosystem is a real asset.
The trade-off is thermal noise on long sub-exposures without cooling, and the stock IR cut filter that attenuates H-alpha response. Canon offers an astro-modified version of some bodies, but this is the stock R8. For unmodified use, shorter subs with good stacking software manage the noise adequately on brighter targets. For serious narrowband deep-sky work targeting faint emission nebulae, the stock filter is a meaningful limitation , worth factoring against the full-frame sensor advantage.
Check current price on Amazon.
Buying Guide
Matching Camera to Telescope Focal Length
The focal length of your telescope defines the angular scale your camera works with. A camera with small pixels on a long focal length produces fine pixel scale , capable of resolving small targets but demanding in terms of tracking accuracy and atmospheric seeing. A camera with larger pixels on a short focal length produces a coarser scale that’s more forgiving. The calculation is straightforward: pixel size in microns divided by focal length in millimeters, times 206, gives arc-seconds per pixel. Targeting 1, 3 arc-seconds per pixel is a practical range for most amateur setups.
Dedicated Camera vs. Mirrorless Body
Dedicated astronomy cameras offer better software integration, optional cooling, and sensor formats tuned to long-exposure imaging. Mirrorless bodies offer larger sensors, interchangeable lenses for wide-field work, and dual-use capability for daytime photography. The decision is fundamentally about workflow. If your primary goal is deep-sky imaging through a telescope, a dedicated camera integrates more cleanly into a full acquisition and guiding pipeline. If you want one camera that handles nightscapes, star trails, and occasional afocal telescope work, the mirrorless body is the more practical tool.
The Guiding Question
Unguided imaging works within a maximum exposure time set by your mount’s periodic error and polar alignment quality. Past that limit , typically 30 to 120 seconds depending on mount quality and focal length , stars trail. Adding a guide camera and autoguiding software extends that limit to practical infinity for most amateur purposes. For anyone planning exposures longer than 90 seconds, a dedicated guide camera is not optional equipment , it’s what makes the data usable. The SV905C fills that role without the expense of a premium guide camera, and for most mid-range setups, it performs the job reliably.
Sensor Modification for H-alpha
The stock IR cut filter in most consumer cameras and many entry-level astronomy cameras blocks the 656nm hydrogen-alpha wavelength that defines virtually all emission nebulae. Cameras with removable UV/IR cut glass , like the SV305C , provide a practical workaround. Full astro modification of a mirrorless body removes or replaces the stock filter entirely, improving H-alpha sensitivity dramatically. This is a one-way modification that affects daytime white balance, so a dedicated modified body is a deliberate choice, not a casual experiment. For anyone interested in exploring the full range of astrophotography techniques, understanding this filter trade-off early avoids expensive surprises later.
Cooling: How Much Does It Matter?
Cooling suppresses dark current , the thermal signal that accumulates in a sensor independent of the sky. At temperate-climate temperatures on short subs of 60, 90 seconds, uncooled cameras are manageable with good calibration frames. On multi-minute subs in summer, thermal noise becomes a real problem without cooling. If you intend to image in warm conditions with sub-exposures longer than two minutes, active cooling is worth prioritizing. For nightscape and wide-field work at short focal lengths where sub-exposures stay under 30 seconds, cooling provides diminishing returns.
Frequently Asked Questions
What is the difference between a guide camera and an imaging camera?
A guide camera’s sole function is tracking a star to correct mount errors , it outputs positional data, not finished images. An imaging camera captures the actual scientific or aesthetic data you process into a final image. Guide cameras prioritize fast frame rates and low noise at small pixel scale. Imaging cameras prioritize dynamic range, total well depth, and resolution.
Can I use a Canon EOS mirrorless camera for deep-sky astrophotography through a telescope?
Yes, with important caveats. The Canon EOS R8’s full-frame sensor is capable for wide-field and bright-target deep-sky work. The stock IR cut filter attenuates H-alpha response, which limits sensitivity to emission nebulae. For telescope use, you’ll also need a T-ring adapter to connect the RF-mount body to a standard 2-inch or 1.25-inch focuser.
Does the SVBONY SV305C require a computer to operate?
Yes. Like virtually all dedicated astronomy cameras, the SV305C connects via USB to a computer running capture software , N.I.N.A., SharpCap, or equivalent. It does not record internally or operate as a standalone camera. A field laptop or single-board computer running the capture pipeline is required.
Is USB 2.0 fast enough for astrophotography?
For deep-sky imaging with individual exposures of 60 seconds or longer, USB 2.0 is adequate , the data transfer per frame is well within its bandwidth. For planetary or lunar imaging, where you capture video at high frame rates to select sharp frames, USB 3.0 is preferable because the throughput requirement is much higher. The SVBONY SV905C uses USB 2.0, which is sufficient for its guiding role. If high-frame-rate planetary imaging is your goal, look for a camera with USB 3.0.
Should I buy a camera before or after my telescope?
Buy the telescope first. The camera’s optimal pixel scale is determined by the telescope’s focal length. Choosing a camera without knowing the focal length you’ll be using risks a pixel scale mismatch that degrades image quality regardless of sensor quality. Once you know your imaging focal length, calculate the arc-seconds per pixel you need and select a camera with matching pixel size.
Where to Buy
SVBONY SV305C Astrophotography Camera, 2.1MP IMX662 Color Telescope Camera with Removable UV IR Cut Glass, 1.25"See SVBONY SV305C Astrophotography Camera… on Amazon